Step-by-Step Guide to Drawing a Beautiful Lily Flower for Students
This work has been verified by our teacher: 17.04.2026 at 10:55
Type of homework: Essay Writing
Added: 15.04.2026 at 5:34
Summary:
Learn how to draw a beautiful lily flower step-by-step with this guide for Indian students, enhancing your art skills and creativity for school projects. 🌸
Mastering the Art of Drawing a Lily Flower: A Guide Rooted in Indian Artistic Spirit
From the timeless murals of Ajanta to the intricate motifs of Madhubani painting, flowers have blossomed at the heart of Indian artistic expression. Among them, the lily stands out—not only as a botanical marvel but as a profound symbol of purity, tranquillity, and beauty in our cultural context. Drawing flowers, especially lilies, is more than just an art exercise; it is a journey that cultivates keen observation, creativity, and patience. For students in India, where education is often rigorous and academically focused, embracing activities like drawing enriches holistic development and a lifelong appreciation for aesthetics.
This essay is tailored to guide absolute beginners—especially Indian students—through each stage of drawing a lily flower, from understanding its structure to perfecting the final touches. We will explore not just the process, but also the deeper benefits of integrating such creative pursuits into our busy lives. Whether you are filling the blank margins of your textbook or setting up an artwork for your school’s annual exhibition, this guide will equip you with both skill and inspiration to bring a lily flower to life on paper.
Understanding the Lily Flower: Characteristics and Form
Before pencil ever meets paper, it is vital to first observe the subject with a deliberate eye. As Rabindranath Tagore once wrote in his poems, “Let your eyes linger upon what seems ordinary, until it reveals its secret beauty.” Lilies, from the white lilies offered in temples to the colourful Asiatic lilies gracing our gardens, share a few defining features. A typical lily flower comprises six large, often curved petals arranged in a star or trumpet shape, a long slender stem, lance-shaped leaves, and in the centre, prominent stamens tipped with pollen.Spend some time with a real lily if possible, or at least clear reference images—notice the way the petals droop, the unique arrangement of stamen, and how the colours flow from the core outwards. There are several types of lilies found throughout India, such as the fragrant white lily (Lilium candidum), symbolising purity and often associated with spiritual offerings, and the bold orange tiger lily (Lilium lancifolium), known for its distinctive spots. Recognising these structural and colour variations allows your drawing to capture not just the shape but the character of the lily you wish to portray.
Preparing to Draw: Art Supplies and Setting the Mood
A good craftsman never neglects his tools; the same applies to drawing. Gather the essentials: standard pencils (an HB for sketching, 2B and 4B for softer, richer lines), a quality eraser, sharpener, thick drawing paper or basic sketchbook, and perhaps coloured pencils or watercolours for the final blooms of colour.Your workspace need not resemble a professional artist’s studio—just a well-lit spot on a table, free from clutter, where you can spread your materials comfortably. In Indian homes, where desks may double up for schoolwork and meals, it’s even more important to create your own little corner of focus.
Before jumping into the lily, warm up your hand by drawing simple lines, circles, and curves. This is a practice as old as the gurukuls, where students began with fundamental exercises before moving to complex tasks. This step is not only about ‘loosening up’; it helps train your hand and eyes to work in harmony.
Step-by-Step Guide to Drawing a Lily Flower
A. Sketching the Foundation
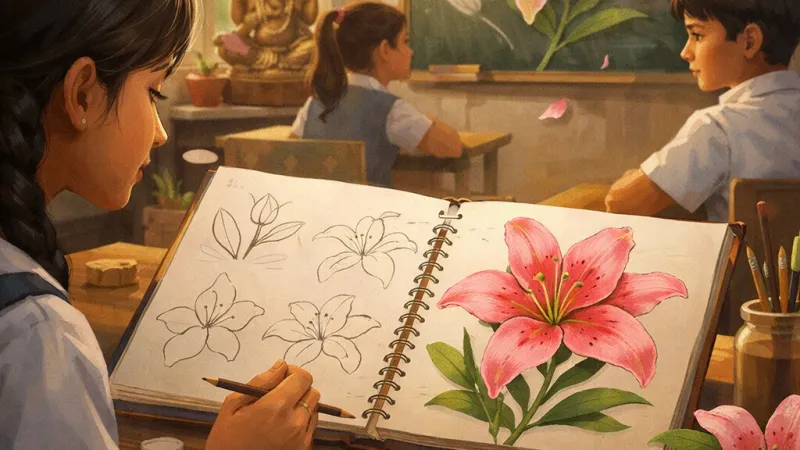
1. The Stem and Leaves: Begin by drawing a gently arching line, representing the main stem. Don’t press too hard; your initial strokes should be light, like the first monsoon drizzle. To the side, sketch elongated oval shapes, slightly curved, for the leaves—most lilies have leaves growing close to the stem’s base and sometimes up its length.2. Mapping the Flower’s Main Shape: Visualise the flower-head as a slightly flattened oval. Mark a centre point to help arrange the petals symmetrically, much like the radial symmetry seen in rangoli patterns.
3. Proportion and Spacing: Use faint guiding lines to split the flower into equal sections—this will help you fit in the six prominent petals without crowding. Remember, no petal is perfectly identical; slight irregularities bring a natural look.
4. Refining Each Petal: Now, carefully sketch each petal from the central point outwards. Observe how the edges swoop and curve. Indian artists like Raja Ravi Varma paid great attention to the delicate curves in the flowers their muses held; you can try to replicate that grace.
5. Drawing the Centre – Stamen and Pistil: Between the petals, draw fine stems (the stamens) emerging from the centre, with small elongated ovals at the tips to represent the pollen sacs. Place the pistil, often a bit longer than the stamens, right in the centre.
B. Adding Details and Life-Like Texture
6. Veins on Petals: Carefully add thin lines running from the flower’s base towards the tips of the petals, hinting at natural veins. Don’t overdo it—subtlety brings realism.7. Leaf Details: Give leaves a midrib (the central vein) and add a few smaller veins branching out. Curl the leaf edges a bit, as seen in nature, for more dynamism.
8. Clearing Unwanted Guidelines: Once satisfied, use your eraser gently to remove supporting lines so that only your refined outlines remain, clean and crisp.
Bringing the Lily to Life: Shading and Colour
The magic of drawing truly unfurls at the stage of shading and adding colour. In Madhubani and Warli, the play of dark and light creates depth; use the same principles here.- Understanding Light and Shadow: Decide where the imaginary ‘sun’ is in your drawing. Shade areas of petals away from the light source more heavily, and leave the parts hit by light almost unshaded. This contrast gives volume.
- Shading with Pencil: With a softer pencil like 2B, add gentle gradients from the base of petals outwards. Petals are usually lighter at the edges and deeper near their base.
- Blending Techniques: To avoid harsh lines, use a soft tissue or even your finger to blend shades. This technique echoes the gradual colour transitions found in natural lilies.
- Adding Colour: If colouring, layer hues gradually. White lilies can be shaded using light blues and greys; pink ones start with a light pink wash and build depth with deeper strokes. Orange lilies can be explored with a base of yellow, overlaid with orange and a dash of brown for shadows.
- Highlights and Contrast: To make certain parts ‘pop’, gently erase small areas to bring out highlights or use a white pencil over coloured paper.
Avoiding Common Pitfalls
All artists, both students and masters, face stumbling blocks. Here are some to watch out for:- Starting Too Complicated: If you stack up details too soon, it might overwhelm your drawing. Begin with simple forms and bloom into complexity step by step.
- Losing Proportion: Continually check if one petal or leaf suddenly looks much larger or smaller than the rest.
- Using Harsh Outlines: Nature is soft. Heavy black outlines can flatten your drawing; opt for softer, buildable lines.
- Fast, Heavy Shading: Rushing through shading might result in uneven, patchy darkness. Shading with multiple light strokes creates a more realistic finish.
- Imagining Instead of Observing: Don’t just draw from memory—use live flowers, or even look at the flower rangolis made during Onam or Durga Puja for inspiration.
Practice, Patience, and Progress
Drawing, much like learning the tabla or reciting poetry, gets better with consistent practice and sincere effort. You might start by doodling one petal a day in your homework book. Maintain a personal sketchbook; our Indian miniature painters, after all, kept extensive portfolios!Try exploring varied interpretations—draw a realistic lily today, try an abstract one tomorrow. Seek feedback from your art teacher, share with friends, or join online student art groups. Most importantly, be patient with yourself—skills, like flowers, bloom in their own time.
The Deeper Rewards of Flower Drawing
The act of meticulously drawing a lily is beneficial well beyond artistic skill. It hones your attention to subtle detail, steadies your hand, and hushes restless thoughts—a much-needed break from exam pressure or daily stress. Drawing in silence, tracing veined petals, can be a meditative process that grounds you in the present moment.Culturally, the lily is a frequent motif in Indian art and literature. Poets speak of its purity, temple offerings symbolise devotion, and folk artists use it to denote new beginnings. When you draw a lily, you are also participating in this age-old tradition of finding beauty in the everyday.
Conclusion
Drawing a lily is not simply about replicating what one sees. It is an act of keen observation, gentle patience, and creative joy—qualities that mirror both artistic and personal growth. By breaking down the process into structured steps and understanding the nuances, anyone—regardless of skill or background—can create a pleasing representation of this elegant flower.So, sharpen your pencil, find a quiet patch by the window, and let your imagination take root. Each petal you sketch adds another layer to your appreciation of nature and your abilities as a growing artist. Mistakes are simply the stepping stones to better art—embrace them as part of your learning journey. Begin your own lily drawing today, and let your artistic voice blossom.
---
Appendix
Suggested Resources
- Books: - "Step-by-Step Drawing Book" by Usborne India - "All-in-One Art and Craft" series by Dreamland Publications- Websites & Channels: - Artyshils Art (YouTube, Indian art teacher) - The Madhubani painting section at the National Museum, Delhi website (for floral inspiration)
Template Sketch (Verbal Description)
- Start with a vertical line for the stem. - Add oval guides for petals in a star arrangement. - Draw elongated leaf shapes along the stem base.Glossary
- Shading: Gradual transition from dark to light to suggest depth. - Blending: Smoothing pencil or colour strokes for a seamless effect. - Contour: The outline that defines the shape of an object.---
Let the art of the lily become the beginning of many more artistic adventures!
Rate:
Log in to rate the work.
Log in